Anastasia’s Mate
Who doesn’t love a dramatic sacrifice during a chess game? And guess what’s even cooler: a sacrifice that leads straight to checkmate.
There’s a special checkmating pattern called Anastasia’s Mate, and learning it can help you pull off amazing checkmates just like that. Get ready to surprise your opponents and look like a chess wizard!
Here is what you will learn in this article:
- What is Anastasia's Mate?
- How the Mating Net Works
- Examples of Anastasia's Mate
- How to Defend Against Anastasia's Mate
- Test Your Skills
- Wrapping Up
- Anastasia's Mate Video
What is Anastasia's Mate?
Anastasia's Mate is a checkmate pattern where a knight and rook trap the king against the edge of the board, often after a tactical sacrifice. Then your knight jumps in with a check that pushes the king to the edge of the board. And finally, the rook zooms over to finish the job with a beautiful checkmate. The knight and rook team up like the ultimate chess superhero duo! Fast, clever, and unstoppable!
Did you know that this checkmate has a super old and super cool origin story? The name actually comes from a book written way back in 1803. In the story, called Anastasia and the Game of Chess, the author Johann Jakob Wilhelm Heinse shows a chess position that uses the same amazing checkmating pattern.
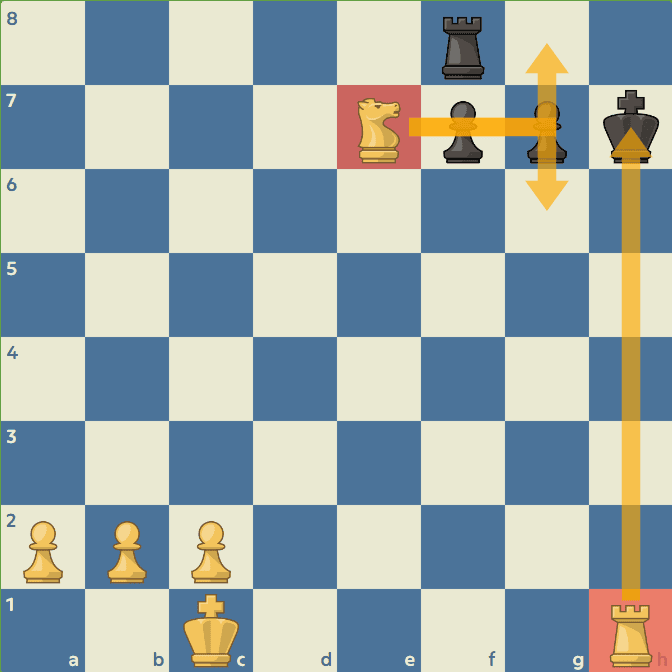
The Final Checkmate Position!
Take a close look at the above checkmate. The knight takes away the g6 and g8 squares from the king, while the rook on h1 delivers the checkmate.
Here's what the Anastasia's Mate pattern looks like in a nutshell.
- A rook delivers the final checkmate.
- A knight controls the king's escape squares.
- The king is trapped on the edge of the board.
- A friendly pawn or piece often blocks one of the remaining escape squares.
How the Mating Net Works
1. Setting the Trap
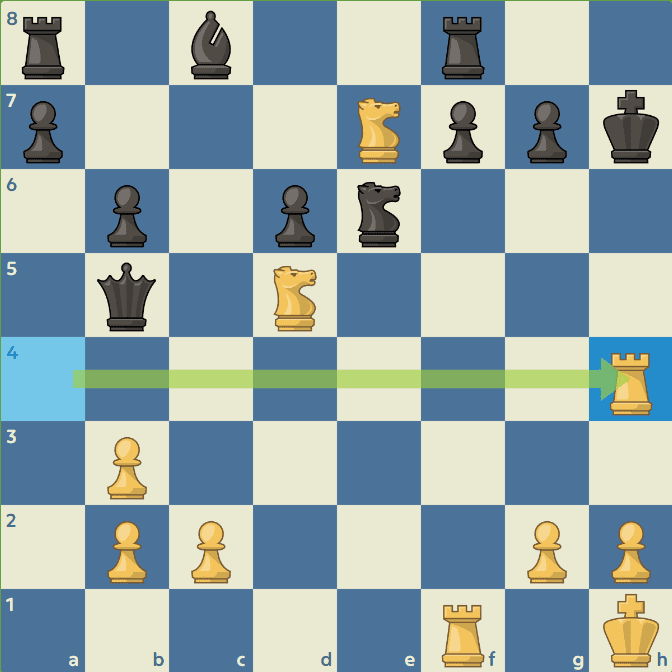
White sets a sneaky trap! The rook’s move from a1 to a4 on the queenside is actually aimed at attacking the black king.
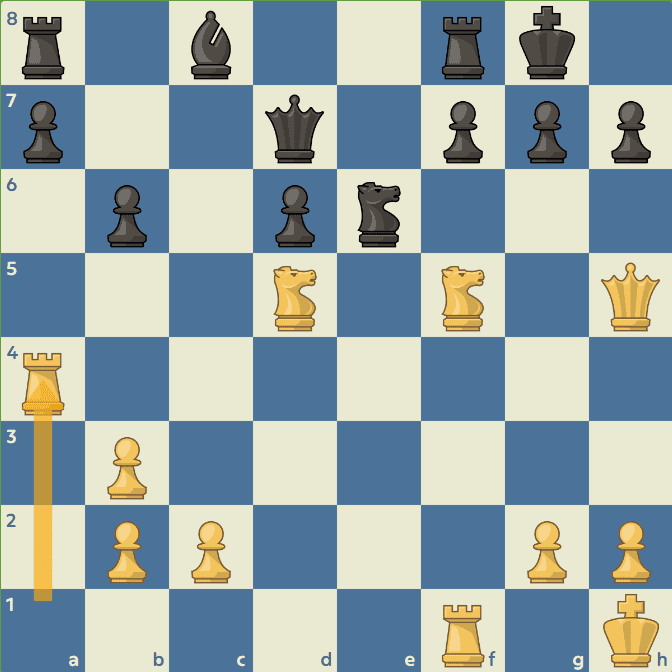
A rook lift sets the trap!
2. Pushing the King to the Edge
Black played ...Qb5 without sensing any danger, even threatening to capture the white rook on f1 with checkmate!
White responds by playing the knight from f5 to e7 with check, forcing the black king to move to h8.
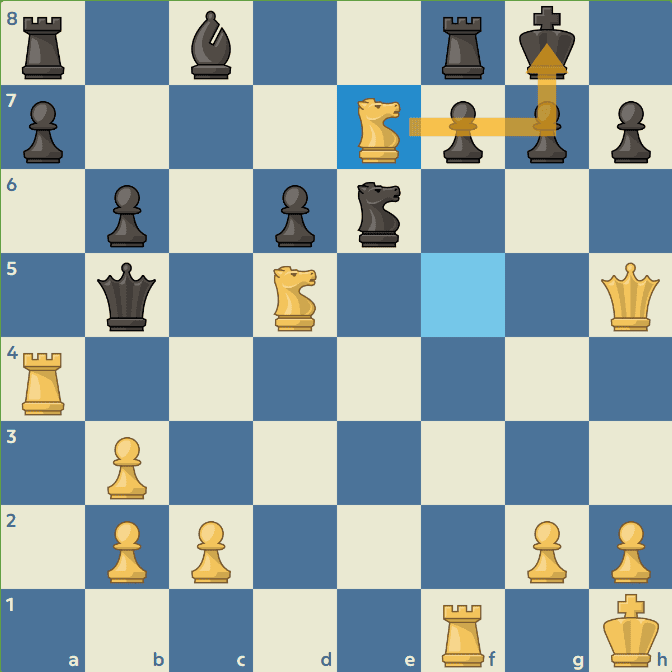
Check! Push that king to the edge!
3. Sacrificing
Now for the unexpected! White sacrifices the queen to open up the h‑file. Remember that sneaky rook move to a4 at the beginning?
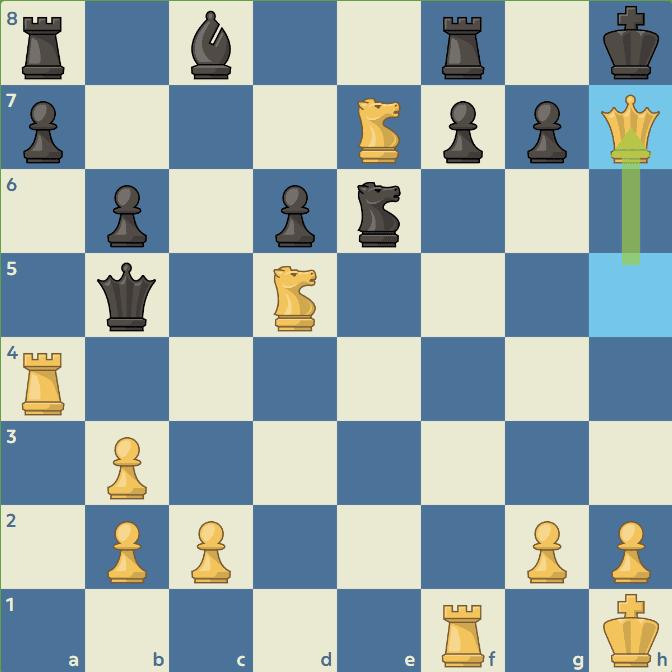
A queen sacrifice!
4. Checkmate
And BOOM! The rook on a4 zooms all the way across the board to finish the game with a beautiful checkmate!
Make sure you notice how the knight on e7 is covering the g8 and g6 escape squares. That’s what makes the mate unstoppable.
Checkmate!
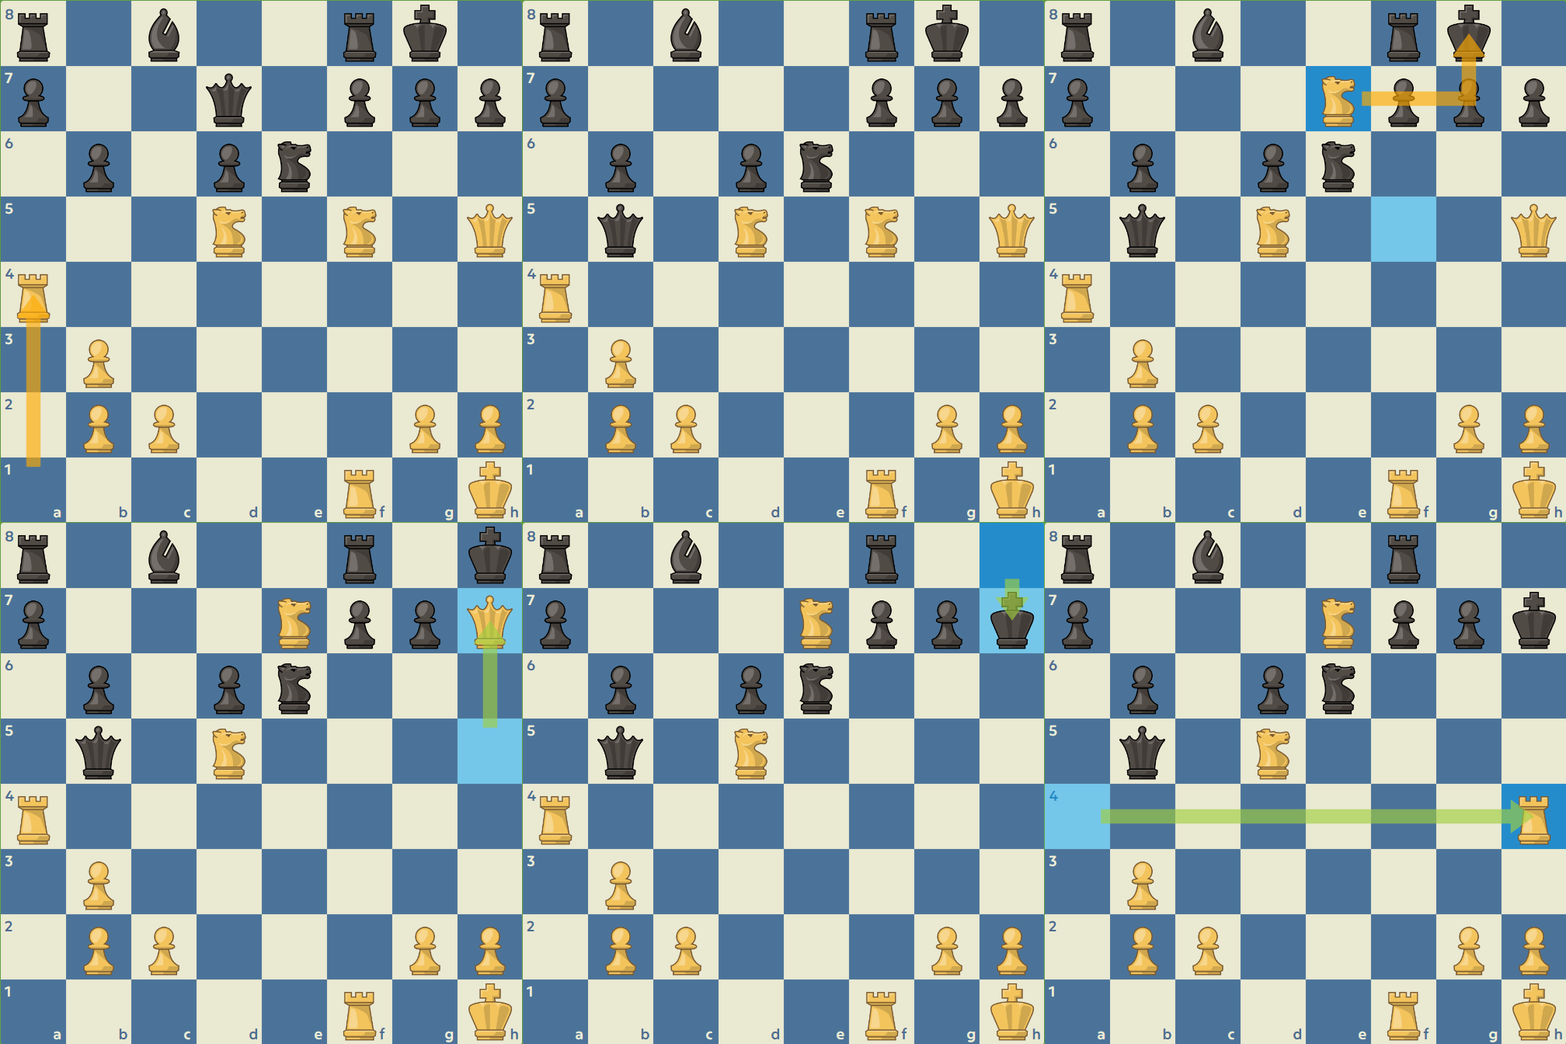
Anastasia's mate in action!
Examples of Anastasia's Mate
Let's take a look at the checkmate pattern in action. Slowly, play through the three examples below to understand all the steps that make this checkmate possible.
Example 1
How to Defend Against Anastasia's Mate
Attacking the enemy king is always a blast, but sometimes you have to play defense too!
After seeing the examples above, you’ll start to notice when your opponent is trying to set up this tricky checkmate. No need to slam the panic button. You’ve got this!
1. Create an escape square for your king.
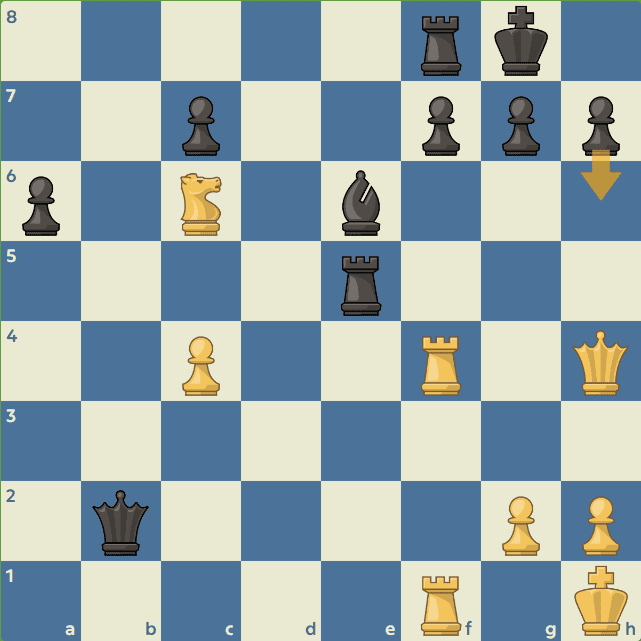
Seeing that an Anastasia’s Mate might be coming, Black plays ...h6 to give the king some breathing room.
2. Block the rook's file.
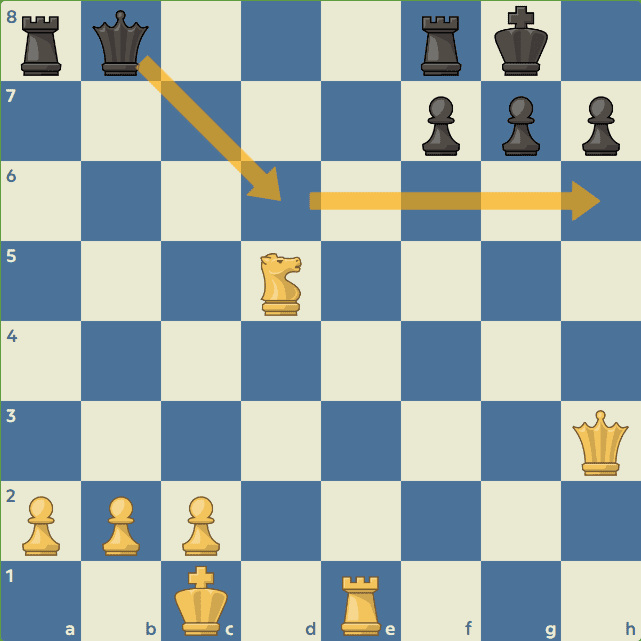
Black plays queen to d6, getting ready to block the h-file.
3. Remove attackers.
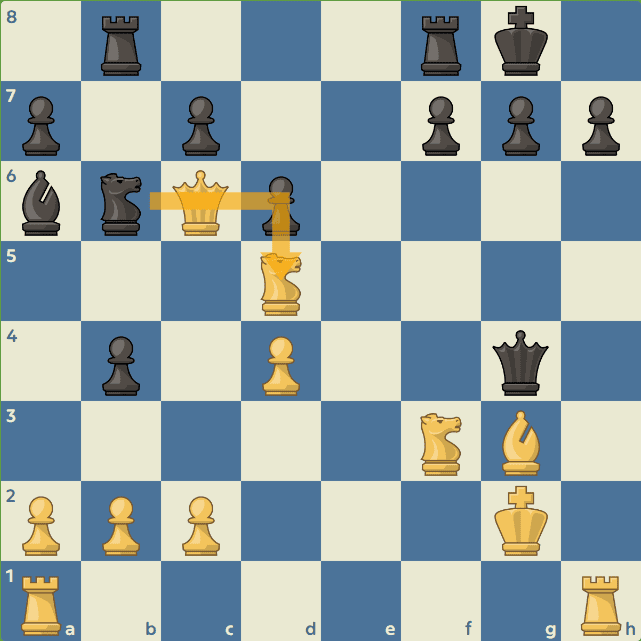
Black captures the White knight before it has a chance to check on e7.
Test Your Skills
Now that you know what Anastasia’s Mate is, have seen the examples, and learned how to defend against it, it’s time to test your new checkmating skills!
Take your time and try to solve the three practice puzzles.
Problem 1
Problem 2
Problem 3
Wrapping Up
This super cool checkmate doesn’t happen very often in real games, but it’s still a must‑know pattern for every chess player!
You’ve learned what it is, seen how the queen, knight, and rook team up, practiced the steps, discovered how to defend against it, and even solved the test puzzles.
Unlike a Smothered Mate, where a knight usually delivers the final checkmate, this checkmate pattern is typically finished by a rook with support from a knight.